Introduction: More Than Just a Pile of Dirt
Every great pitcher has a starting point — and often, it isn’t a professional stadium.
It’s a dusty local park, a bare patch of grass in the backyard, or a school field after hours. What transforms those casual throws into purposeful pitches is the pitching mound beneath their cleats.
If you’re a baseball parent who dreams alongside your child, a coach determined to give your team an edge, or a player with the drive to train beyond scheduled practices — building a pitching mound is far more than a weekend project. It’s a long-term investment in skill, confidence, and the baseball dream.
The best part? You don’t need professional landscapers or thousands of dollars to make it happen. With the right information, the right materials, and some dedication, you can create a mound that meets professional standards — right in your own space. This guide will take you step by step, from planning to maintenance, so you can build a mound that’s safe, durable, and game-ready.
The Real Purpose of a Pitching Mound
A pitching mound isn’t just a raised patch of dirt — it’s a performance platform designed to shape pitching mechanics, timing, and power.
Here’s why it matters:
Game Simulation – Pitching from elevation replicates real-game throwing angles, foot placement, and gravity-assisted pitch movement.
Arm Mechanics – The slope encourages proper shoulder tilt and stride length, helping pitchers develop efficient throwing form.
Leg Drive – The incline forces pitchers to push off explosively, adding velocity and consistency to pitches.
Timing & Rhythm – Flat-ground practice can distort a pitcher’s tempo; a mound helps set the correct delivery rhythm.
A properly built mound teaches proper mechanics. Without it, even the most talented pitcher may struggle to transition effectively from practice to live games.

Choosing the Right Type: Permanent vs. Portable Mounds
Before you start construction, decide which mound style fits your needs best.
🏠 Permanent Pitching Mound
Built from dirt, clay, or a professional clay mix
Ideal for backyards, training fields, or long-term installations
Requires excavation, shaping, and consistent upkeep
Matches the feel of competitive baseball fields
🚚 Portable Pitching Mound
Constructed from wood, turf, or composite materials
Lightweight enough to be moved and stored
Perfect for coaches, multi-use spaces, or small yards
Easier to build, but must match official slope and height to ensure proper mechanics
💡 Pro Tip: If you’re unsure about your long-term needs, start with a portable mound. It’s a cost-effective way to experiment before committing to a full-scale, permanent setup.
Standard Pitching Mound Dimensions
Building a mound isn’t guesswork — precise measurements are key to performance and safety.
| Level | Mound Height | Distance to Home Plate |
|---|---|---|
| MLB / High School | 10 inches | 60 feet 6 inches |
| Pony League / Youth | 8 inches | 50 feet |
| Little League Minors | 6 inches | 46 feet |
Other essential measurements:
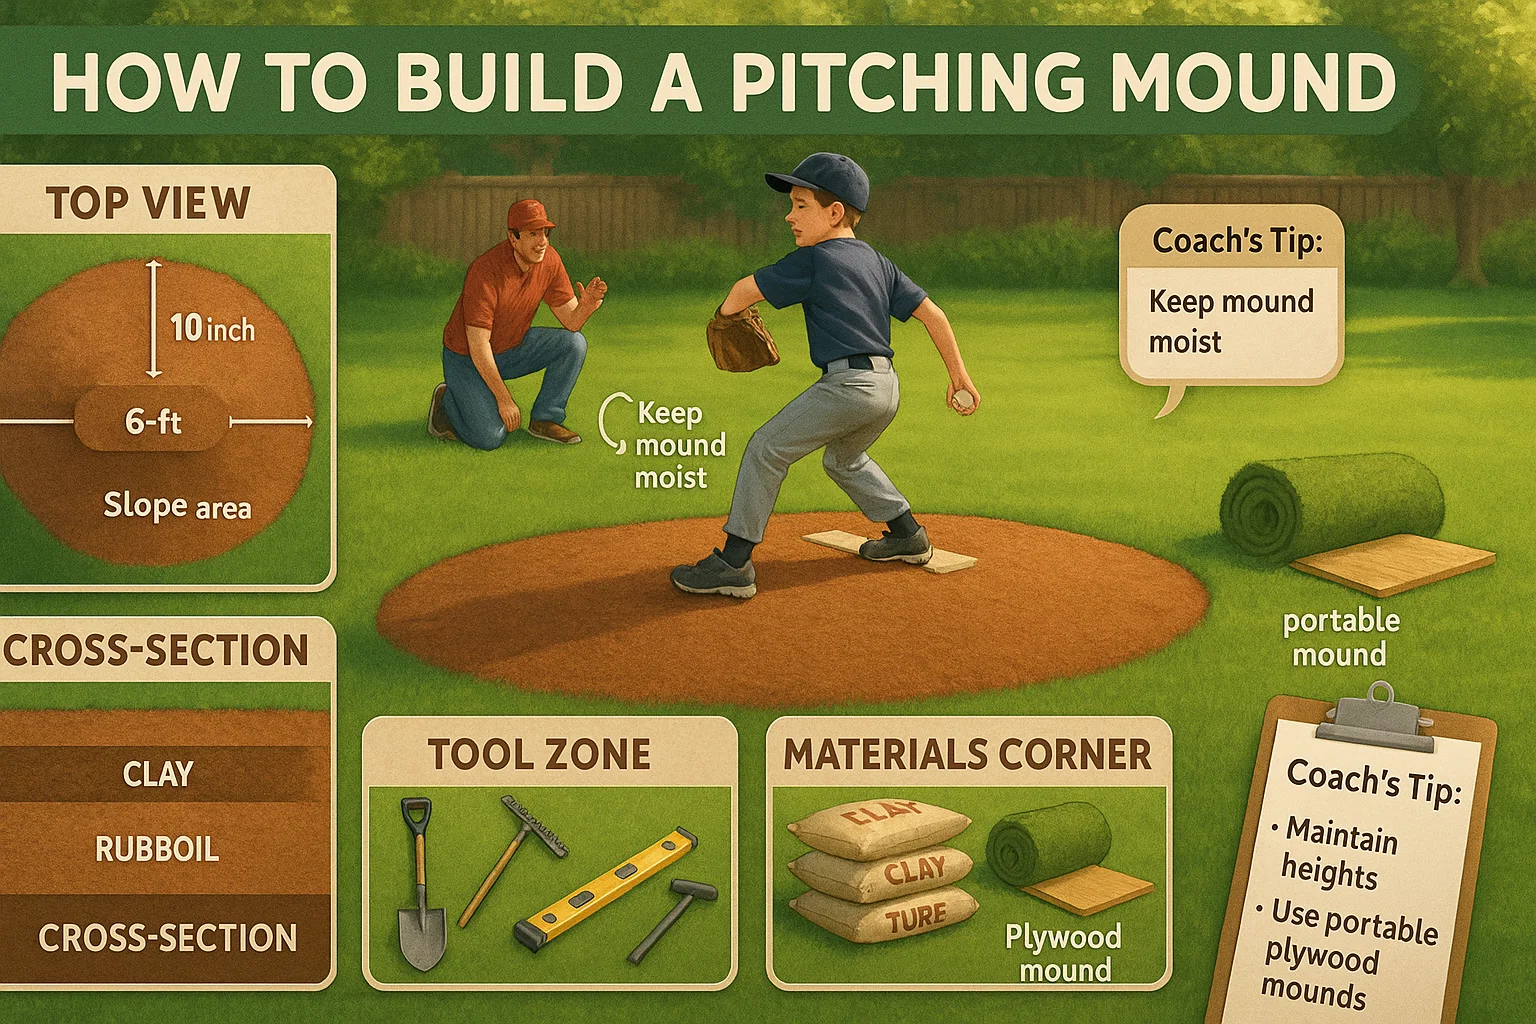
Mound Diameter: 18 feet
Flat Landing Area: 5 feet across
Slope: Begins 6 inches in front of the pitcher’s rubber and drops 1 inch per foot for a total of 6 feet
📏 Pro Tip: Use stakes, string, and a measuring tape or laser level to mark these dimensions before construction begins.
Materials & Tools Checklist (Permanent Mound)
Tools
Shovel & Rake
Wheelbarrow
Tamping Tool or Hand Tamper
Level / Laser Level
Measuring Tape
String & Stakes
Materials
Clay Mound Mix (not regular garden soil)
Pitcher’s Rubber (24 inches wide)
Topsoil or Infield Mix (for finishing)
Tarp (to protect when not in use)
💡 Pro Tip: Purchase clay from a sports field supplier. It holds shape better than dirt and resists crumbling under repeated use.
Step-by-Step: How to Build a Permanent Dirt Mound
Step 1: Choose and Prepare the Location
Select a spot with good drainage and enough clearance (18-foot diameter). Remove all grass, roots, and debris so the base is clean and level.
Step 2: Mark the Layout
Use stakes and string to form the mound circle. Mark the top platform (5 feet) and where the slope will begin (6 inches in front of the rubber).
Step 3: Build the Base Layer
Fill the mound area with clay in 2-inch layers:
Lightly spray each layer with water
Tamp firmly before adding the next
Continue until you reach the desired height
Step 4: Shape the Slope
From the front of the rubber, create a 1-inch drop per foot over a length of 6 feet. Use a level to check accuracy — a smooth, even slope is crucial for consistent footing.
Step 5: Install the Pitcher’s Rubber
Center the rubber on the top platform, flush with the clay. Secure it either by embedding it into the clay or fastening it to a buried wooden block.
Step 6: Finish the Surface
Spread a thin layer of topsoil or infield mix for a smoother surface. Water lightly, tamp down, and check for any uneven spots.
Step 7: Protect the Mound
Cover with a tarp to shield from rain or harsh sun. Inspect regularly for erosion or soft spots, especially after heavy use.

Optional: Building a Portable Pitching Mound
If you can’t dig or want mobility:
Frame: Build using 2×6 boards
Top Deck: Use ¾-inch plywood for the landing area
Slope: Create with stacked 2x4s or angled supports
Cover: Add artificial turf or outdoor carpet
Rubber: Install a standard-size pitcher’s plate
⚠ Note: Even portable mounds must match official slope and height to maintain proper mechanics.
Pro Tips from Experienced Coaches
✅ “Moist clay compacts better than dry clay. Keep a spray bottle handy.”
✅ “Even a half-inch tilt under the rubber can throw off balance — always check with a level.”
✅ “Step on the landing area yourself before letting pitchers use it — small uneven spots can cause injuries.”
Common Mistakes to Avoid
❌ Using regular dirt instead of clay mix
❌ Guessing slope measurements instead of using tools
❌ Ignoring drainage — leads to mud and erosion
❌ Overwatering, which softens the surface too much
❌ Allowing cracks to develop without repair
Final Thoughts: From Backyard Dirt to Big League Dreams
Building a pitching mound is more than construction — it’s an act of belief.
Every shovel of clay, every carefully measured slope, every tamped landing spot says:
“I believe in this player’s dream.”
Whether it’s your child, your team, or yourself, a properly built mound creates an environment where skills sharpen, confidence grows, and passion for the game deepens. From backyard beginnings to competitive fields, this is where great pitching starts — one step, one pitch, one dream at a time.


